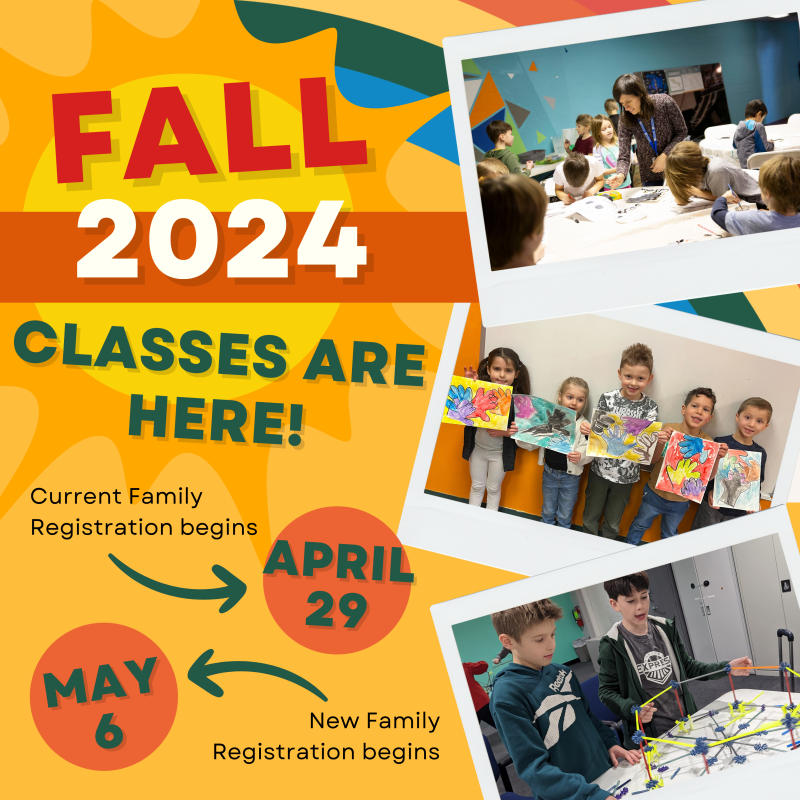
Orbund is our online system for communication between students, parents, and instructors.
Go to hc.orbund.com. Or copy and paste https://hc.orbund.com into your browser search bar.
You should have received an email with your login information. If you have not, please email help@MIHomeschoolConnections.com.
You and your child will have separate logins.
Make sure you type in both your username and password correctly before contacting Carrie for help.
Also, make sure you select “Parent” or “Student” appropriately. Each time, the dropdown will default to “Instructor”.
The Start Page is the first screen you will see after logging in.
If you need to go back to the Start Page, click on “Start Page” on the top left column. It is in white text with a blue background.
On the Start Page, you will find News & Announcements. These are very important to read. Click on the blue text to read the announcements.
The grey boxes underneath the News & Announcements are called widgets. The boxes include messages, upcoming events, and assignments due. Which widgets are shown will be different for students and parents.
Assignments will only show when your student has assignments to do! Fast Five Feedback is not an assignment. To learn more about Fast Five Feedback, refer to the “How do I find Fast Five Feedback?” dropdown.
After you log into Orbund, you may find a notification about having unread messages under “News & Announcements”. You need to read these as this is how teachers communicate with parents and students!
Messages will also be listed in the “Messages” widget on the Start Page.
To read the message, click on the “new messages” in blue text, the name of the message in the widget, or “Messages” under “Communication” in the left sidebar.
Here is an example of what the messages page will look like:
On the right, the “Status” column indicates whether you have read the message or that it is new.
To delete read messages, click the box to the left of the date of the message. A checkmark will appear. Then, in the “Move to” dropdown box, choose “Trash”. Then click “Move”. The message will instantly be moved to your trash folder (similar to an email inbox).
To move messages back into your inbox, choose “Trash” from the dropdown menu next to “Messages/Folder”.
Your deleted messages will appear. Check the box next to the message you’d like to move to your inbox. Select “Move” to move the messages. They will instantly move to your inbox.
Messaging your teacher through Orbund is the best way to communicate with them.
In the menu sidebar on the far left, click on “Communication”. Options will appear underneath:
Click on “Messages”. Then on the far right side, click on “New Message” (circled in red below).
Next, it is time to select the recipient(s).
Click on the appropriate category of your intended recipient. For this example, we will email a campus supervisor, Jessica Thompson. Start with clicking “Add Staff” because campus supervisors are staff members. (Note: if you have an emergency, call your supervisor. Contact information is found here.)
Names are organized by last name. To save time, you can click on the appropriate letter. For Jessica Thompson, click “T”.
To insert her email, click the box to the left of her name. When a checkmark appears, then click “Add”. If you’d like to add more recipients, find their name and continue check the box then clicking “Add” after each one. When you’re done select “Close”.
Fill in an appropriate subject into the subject line.
Enter the message you’d like to send. You may attach a file, if needed, by clicking “Upload File”.
When finished, select “Send Message”.
You may check your child’s attendance with either your parent login or your child’s login.
In the menu sidebar on the far left, click “Attendance”, then “Attendance Records”.
When your child’s attendance appears, make sure you double check the settings in the dropdowns along the top. Check the student’s name, the semester, and the class to match what you are looking for.
Scroll down on the webpage to see more.
Use the key along the top to understand your child’s attendance record. This example used a test student so very little information is available. Your child’s information will be more extensive as the semester progresses.
First, log into Orbund with your parent login.
Then in the menu sidebar on the far left, click on “Finance”. Then click “Payment & Invoice”.
This is an example of what should appear:
Always double check that the correct semester and payment plan are chosen. To see an expanded view or breakdown of you bill, click the plus sign next to your student’s name. An expanded, itemized list will appear. For example:
Payments by check may be mailed to:
Homeschool Connections Educational Services, LLC
2685 Lapeer Rd.
Suite 208
Auburn Hills, MI 48326
You may also make payments via credit card or online check within Orbund.
We understand that families with multiple children in the program may need to arrange a payment plan. Please contact our financial services office to set one up. They can be reached at accounting@mihomeschoolconnections.com.
Students can find their schedule the same way as parents (outlined below), but will not be able to see anyone else’s schedule.
To find your child’s schedule, click “Enrollment & Schedules” in the far left menu sidebar. The choose “Class Schedules”. If you see the message “No schedules found.”, make sure the correct student and semester are chosen. “Winter 2019” is the system’s default.
After you have chosen the correct student and semester, you should see your child’s schedule.
The classes above are test classes for demonstration. Looking at your schedule, the class code is listed, followed by the location in parentheses. You can find the full name of the class by looking up the code in our course descriptions.
(There is a shortcut of this: if you hit “Crtl” and “F”, a search bar will open at the top of your web browser. Type the code in the search box. This will find & highlight the code! Click the “x” or exit button to close this search bar.)
For class locations, abbreviations are used for each campus:
After the campus abbreviation, the room is listed.
Log in with your Parent Login.
In the left menu, select “Reports & Transcripts”. Then choose “Academic Transcripts”.
Make sure the correct child is selected in the dropdown menu. Then you’ll see the child’s total credit hours since we switched to Orbund in the Fall of 2018.
If you need an updated transcript or records from before Fall of 2018, please email Help@MiHomeschoolConnections.com.
This is required for ALL families, even returning families!
Using your parent login, this form is found in Orbund. Then under “Reference” (on the left side), then “Forms” (on the left side). Then choose (on the far right side) “New Enrollment Agreement”.
Remember to click “Submit Form” at the end. This sends us your agreement form. If you do not, we will not receive it!
There are many important fields, such as emails, funding type, and cellphone numbers, that need filled in.
If there is an emergency, we need your (the parent or guardian’s) cellphone number in Orbund! This is where we look for critical contact information!
In order to receive notifications from Homeschool Connections, your email must be entered in correctly.
A critical field in the profile is the funding type. Selecting the funding type determines whether your information will be shared with district funding sources. If you are self pay, this will keep your information from going to any funding program. If you are funded through any district or outside funding program, for any classes at all, then select the appropriate funding type and this will ensure that your information will be shared with the program as necessary.
Always click “Save”.
This is required for each student, even returning students!
Using your student login, this form is found in Orbund. Then under “Reference” (on the left side), then “Forms” (on the left side). Then choose (on the right side) “New Behavior-Agreement”.
Login into Orbund with your student login.
In the left-side menu, click on “Classes”. Then choose the appropriate class.
The class syllabus will be in the first week’s folder.
If you cannot see your class assignments, then they will appear here on the first day of the semester.
Read the far-right column on our Class Descriptions page. Note: Not all classes require books.
Using your student login, this form is found in Orbund. On the Start Page, you will see “Account & Profile” listed on the far right side of the page. Click “Account & Profile”.
Fill in all of the information fields, continuing through each tab across the top. Click “Save” as you finish each tab! It doesn’t hurt to return to each tab to make sure your answers are still there.
There are many important fields, such as email, cellphone, and funding type, that need to be filled in. A critical field in the profile is the funding type. Selecting the funding type determines whether your information will be shared with any district funding programs. If you are self-pay, this will keep your information from going to any outside funding programs. If you are district-funded, then this will ensure that your information will be shared.
This is Homeschool Connections’ new, online, weekly component that will be implemented in every class as a type of “homework.”
We are incorporating this measurable instrument as part of our routine for students and teachers because of its many benefits:
Word of Caution: ALWAYS BE SURE TO LOOK FOR FALL SEMESTER!!!!
Log into the student’s Orbund account.
Take note of the Student’s Start Page. The window below shows the left side menu. Click on Classes (circled in Red). You will see a list of ALL classes, including Fall and Winter. Be sure to look for the “Fall 2018” in bold (circled in Blue) and select a class below that.
Click on the desired class and this window will appear, or something like it with YOUR student’s class information.
Click on Fall Week 01 (or the appropriate folder used to differentiate Week 1) and the information for that week will drop down.
Your student’s may look a little different, but you will see “Assessments” (in pink) and you will want to click on Fast Five Feedback (red arrow) which will change to a link when you hover over it.
You will then see the following window where the student is given the information about the Fast Five Feedback. The Student clicks on “Start Exam” (circled in red).
This screen will appear. Click “Yes” (in red) if you are ready to proceed and “Cancel” (blue) if you are not.
After your last question, click Save (red) then Finish (blue).
After clicking Submit, you will be directed to a window that shows how many attempts you have left.
You can try again or be done. The student’s score does not show at the end of the assessment. To see what they score they earned, please see the student’s progress report, and look for the Fast Five score for the correct week.
Using your parent login, this form is found in Orbund.
In the menu sidebar on the far left, click “Setup”. Then choose “Account & Profile”.
Fill in all of the information fields on the General Info tab. It is imperative that you fill in your cell phone number.
Remember: Click “Save” when you finish!